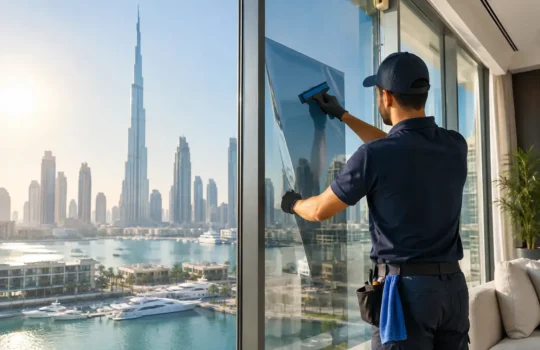

A glass meeting-room wall that turns private at the press of a button looks simple from the finished side. Behind it, the wiring plan determines whether the installation remains tidy, reliable, and easy to service. This guide to switchable film wiring explains what needs to be decided before Smart Film is fitted to glass in a villa, office, clinic, or specialist space.
Switchable film is usually selected for on-demand privacy while keeping daylight when the glass is clear. It is not simply a privacy film with a switch attached. The film, busbars, electrical connections, power supply, controls, and cable routes must work together. Planning these details before joinery, ceiling work, or final decoration can avoid visible cables and unnecessary rework.
How switchable film wiring works
Switchable Smart Film uses a liquid-crystal layer that changes appearance when electrical power is applied. In many PDLC film systems, the film appears clear when powered and turns opaque when power is removed. That is often useful for privacy, but it also means the desired fail state matters. If a power interruption occurs, the glass may return to its private, opaque state. The exact behavior should always be confirmed for the specified film system.
Each film panel has conductive busbars, typically positioned along one or more edges. These busbars connect to a dedicated power supply or transformer, which converts the building electrical supply to the voltage and current required by the film. The film must never be connected directly to a standard mains supply.
The power supply, cable type, maximum panel size, and permitted cable length are product-specific. Those details should come from the film manufacturer and be followed by the electrical contractor. A low-voltage film connection is still part of an electrical installation, so access, protection, loading, and neat termination all matter.
Start with zones, not cables
The first question is not where the wire will run. It is how the glass needs to operate. A single small bathroom sidelight may need one simple on-off switch. A boardroom with several glazed partitions may need independent control for each wall, or one control that changes the entire room at once.
A zone is a group of film panels that operate together. Defining zones early prevents common frustrations, such as a full office frontage switching opaque when only one consultation room needs privacy. It also affects the number and capacity of power supplies required.
For larger projects, consider how occupants actually use the space. Reception areas may need privacy only after business hours. A clinic may need instant screening around one treatment area while keeping the rest of the room clear. In a villa, a switchable glass partition may be controlled locally, while a glass wall facing a dressing room may benefit from a discreet keypad or approved home-automation control.
Independent zones provide more flexibility, but they add controls, wiring routes, and commissioning time. One shared zone is simpler and may cost less. The right approach depends on the room layout and the level of control genuinely needed.
Control options need early coordination
Switchable film can often be operated through a wall switch, remote control, relay, timer, or building-management and smart-home interface. The practical point is that the selected control method must be compatible with the power supply and wiring arrangement.
For a commercial fit-out, the electrical and automation teams should agree on the switching method before the ceiling is closed. A relay interface may be required where the film is controlled through a centralized system. For a residential project, a conventional wall switch can be the clearest and most dependable choice when advanced automation does not add a real benefit.
Avoid assuming that any smart switch can control the film directly. Some switches are designed for lighting loads, while switchable-film systems may require a suitable relay or control input. The installer should coordinate with the electrician rather than treating the film as a standard light fitting.
Where should the power supply go?
The power supply needs a dry, ventilated, accessible location. It should not be sealed permanently behind fixed joinery, inside an inaccessible ceiling void, or buried in a wall with no practical way to inspect or replace it later.
A nearby cabinet, service void with an access panel, or properly planned ceiling access point can work well. In a high-end fit-out, this location is often overlooked because the finished glass receives most of the attention. Yet an accessible power supply is what makes future fault-finding and servicing far less disruptive.
For multiple panels, it may be better to use more than one appropriately sized power supply rather than trying to run long, complicated cable routes to one distant point. This depends on the approved system design, panel sizes, and load calculations. Shorter, organized routes can also make installation cleaner.
Heat must be considered too. Dubai interiors can have warm ceiling voids, sun-exposed glazing, and tightly enclosed cabinetry. Power supplies should be installed within their approved environmental limits, with suitable ventilation and no conflict with other building services. A site assessment should identify these conditions before installation day.
Concealing wires without compromising the installation
Most clients want the electrical connections hidden, particularly on frameless partitions, villa glazing, and premium meeting rooms. This is achievable when the glass system and surrounding finishes are planned together.
Cable routes are commonly concealed within a frame, mullion, head channel, wall return, ceiling void, or purpose-made trim. The best route depends on whether the glass is framed, frameless, fixed, sliding, or part of an existing partition. The connection point must remain protected from accidental pulling, moisture, cleaning chemicals, and visual exposure.
Retrofitting switchable film onto existing glass is possible in suitable cases, but cable concealment can be more challenging than in a new fit-out. If no frame or ceiling route is available, a small surface-mounted trunking or carefully finished cover may be the practical answer. It is better to discuss that honestly than promise an invisible result where the construction does not allow one.
Never plan to drill or cut toughened glass after installation to create a cable route. Tempered glass cannot be modified in that way without a serious risk of breakage. The route must use the existing framing, surrounding construction, or a revised design.
Glass compatibility and film layout matter
Switchable film is applied to the interior-facing surface of suitable glass. Before work begins, the installer should assess the glass type, panel dimensions, edge condition, frame details, access, and whether the surface is clear enough for a clean visual finish.
Large panes may need to be divided into separate film sections. This can be due to film dimensions, handling requirements, or practical wiring layout. Where sections meet, fine joint lines may be visible. They should be planned around mullions, design lines, or less prominent parts of the glass where possible.
The film provides variable privacy, not a guaranteed solar-control solution. When clear, it allows light through and may still receive substantial solar gain on a sun-facing façade. When opaque, it diffuses the view but does not replace a properly specified solar-control film where heat and glare are the primary problem. If a Dubai villa has strong afternoon heat through large glazing, the privacy requirement and solar-control requirement should be assessed separately.
Combining products on the same glazing may be possible only where the glass construction, visual result, and film compatibility have been reviewed. Layering films without a proper assessment can affect appearance, light transmission, and thermal behavior.
A practical installation sequence
The cleanest projects follow a clear order. First, the glass and room are surveyed, including measurements, frame details, nearby power availability, and how each zone should operate. Next, the film layout and electrical plan are agreed with the client, electrician, and fit-out team where relevant.
Power and control cabling should be installed before final ceilings, wall finishes, or joinery make access difficult. The glass must then be cleaned and prepared carefully before film application. After the film is connected, each zone should be tested for clear and opaque operation, consistent appearance, and correct control response.
Testing should include the practical details: Are cables concealed as agreed? Is the power supply accessible? Does each switch control the right panel? Does the room provide adequate privacy in both daytime and nighttime lighting conditions? Smart Film obscures the view, but strong lighting on one side of the glass can still influence what is perceptible, especially around edges and adjacent uncovered glazing.
Questions to settle before approving switchable film wiring
Before finalizing a Smart Film project, confirm the following with the installer and electrical team:
- Which glass panels will be separate control zones, and which will operate together?
- Where will the approved power supplies sit, and how will they remain accessible?
- How will cables reach the busbars without visible or vulnerable connections?
- What should happen during a power outage: private or clear?
- Is the goal privacy only, or does the glazing also need heat, glare, or UV management?
- Are the glass type, frame, ceiling, and nearby finishes suitable for the proposed film layout?
A well-planned switchable film installation should feel uncomplicated to use because the technical decisions were made before the glass became the finished feature. The most useful next step is a site-specific assessment that considers the glass, wiring path, controls, and privacy expectations together – not as separate trades.